Showing Wax
Processing Wax for the Show Table
By Liz Westcott
Uncapping comb: I prefer to use a fork rather than a knife as I think there is less honey wastage. A fork simply lifts the cappings off. A knife slices through the comb and the honey. I use a Combcapper Uncapping Frame Rest (£31.85) which I bought from Mann Lake – now Bee Equipment Ltd UK- which fits a 5 US gallon bucket. I line the bucket beforehand with a net sack so the cappings fall into the bucket but are caught in the sack. When I have finished uncapping, I tie a cord around the net sack of cappings and suspend it over the bucket. I leave it for a few days and then filter the honey and put it in jars. This honey can be used for cooking or making mead.
The cappings need to be washed in pure water without chlorine. You can use rain water, bottled water or I have a good filter on my tap which takes the chemicals out. When cappings have been washed, this water can be used for making mead, if you wish, once it has been filtered. You need to wash cappings because if there are sugar crystals in the cappings the wax makes tiny balls around them.
 If you wish to process wax for showing, then you need to sort cappings and comb into light and dark wax. When I am transferring cappings from the net sack to the receptacle for melting, as I pick up each handful I just look quickly for any wax which is dark or covered in propolis. Propolis makes the wax opaque and cloudy and we are looking for clear, bright wax. You can use this darker wax for making furniture polish.
Put the comb or cappings into an old saucepan with warm water. Gently warm in a bain marie (I sit the saucepan in a large frying pan or bigger saucepan) until all the wax has melted. Or you can put them with warm water in a bucket or bowl and put them in the oven to melt. I have a honey warming cabinet which has a thermostat allowing me to raise the temperature to 80C made by Mike Ticehurst. The temperature of bees wax should not exceed 90C or it will darken and be useless for showing. You can also put wax in the oven but you need to put a meat thermometer in to check that the temperature does not go higher than 90C.
When the wax is completely melted, take a metal coat hanger and shape into a loop to fit over the bowl or bucket you are using to strain into. Always put newspaper down to protect worktops when working with wax. Take an old pair of tights or buy cheap ones from the Pound Shop and slip over the metal loop to act as a filter. Pour the wax and water mixture through the tights into the bowl. You will need a stick or an old knife to make an indent in the tights or the water and wax mixture will bounce off or overflow. At the first filter you will get all sorts of black muck come out of the wax. It is important not to use a fine filter at this stage because the muck will clog the filter and it will take ages to go through. In the bucket the wax and water will separate, water on the bottom, wax on top. This makes it much easier to get the set wax out of the bucket. Leave to set. I use a plastic bucket because the sides have some give in them and the wax can be released by gently squeezing them. If there is any difficulty, put the bucket in the fridge for a couple of hours for the wax to shrink away from the sides. If it still difficult to get the wax out, put the bucket in the freezer for a couple of hours and then the wax will shrink further and fall out.
This is the first and main filter of the wax. If you look at the underside of the wax, if it was particularly dirty, you will see a thin black band where the impurities have settled to the base of the wax. You can either get a sharp knife and cut this layer off or you can melt the wax and process again, exactly as the first time but when you get to the stage to filter the wax put a clean jay cloth or piece of wet wipe over the tights and filter again. This should take out the majority of impurities and each time you filter you will achieve cleaner wax. However, the colour will only lighten to a certain degree. If you have brown wax it will stay brown – albeit clean – so it is important to sort your wax by colour at the beginning of the process. If you want light coloured finished wax then you have to make sure you take the pieces of dark wax out and process it separately. Eventually, you will have a light coloured, clean block of wax.
However, having a large cakes of wax can be difficult to use in recipes that require a relatively small amount of wax so I melt the block of wax in a jug without water. When it is all melted, I pour it into one ounce block moulds so it is ready to weigh out for the recipes I use.
When you have arrived at clean wax that you decide to show as a block, melt it in the oven. A Class for a block or cake of wax will specify the minimum weight, eg 450g. I put the container I am going to pour the wax into on the scales and weigh the wax as I am pouring it in. I would probably put 475g in my mould to ensure it is well within the specified weight. Put the wax back in the oven, turn the oven off and leave the wax in the oven to cool slowly. This will ensure an even surface as the wax cools. The next morning, take it out and allow to cool further to room temperature. Then repeat the steps above by putting in the fridge or freezer to release the wax from your mould.
Be aware that the more you heat wax the more it will lose its opaqueness and aroma – the qualities that will win that first prize – so you need to get your wax as clean as possible in as few heatings as possible.
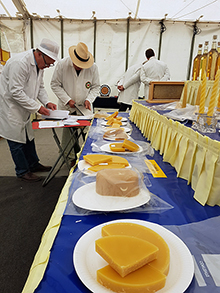
Always choose your best wax for making candles and one ounce blocks. On the Show table, the judges will weigh all blocks to ensure they are up to weight so ensure they are up to weight before you enter them. You don’t need to put one ounce blocks back in the oven to cool.
NEVER POUR WARM WATER AND WAX INTO THE SINK OR DOWN THE PLUGHOLE! I have a corner in the garden, behind the shed where I pour all my waste water and wax.
Enjoy your wax work and if you have any questions don’t hesitate to get in touch – Liz Westcott.


